Compare Wizard
This section takes you through each step required to use the Compare Wizard: including how to launch the wizard (two ways), how to choose compare source and target, how to configure and refresh or use pre-indexed documents for the compare process and how to map documents to compare.
Launch the Compare Wizard
The Compare Wizard can be launched via the Wizards dialog or via the main menu. See below:
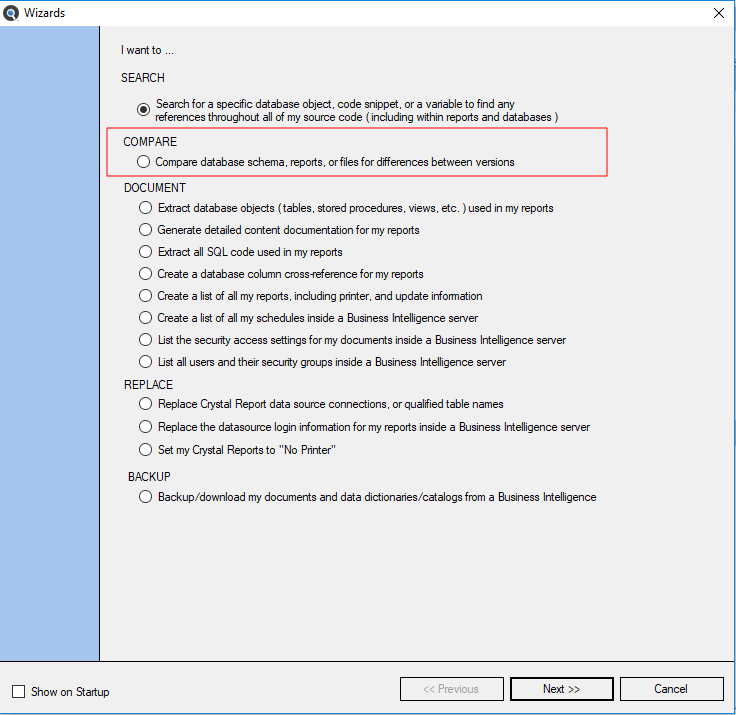
- Launch the Compare Wizard via the main Wizards dialog:
Click on the button on the search bar.

- Click to choose the following COMPAREoption:
Option 2: Compare database schema, reports or files for differences between versions
OR
- Launch the Compare Wizard via the main menu:
From the Find it EZ menu, select

- The Compare Wizard will open.
Choose Compare Source and Target
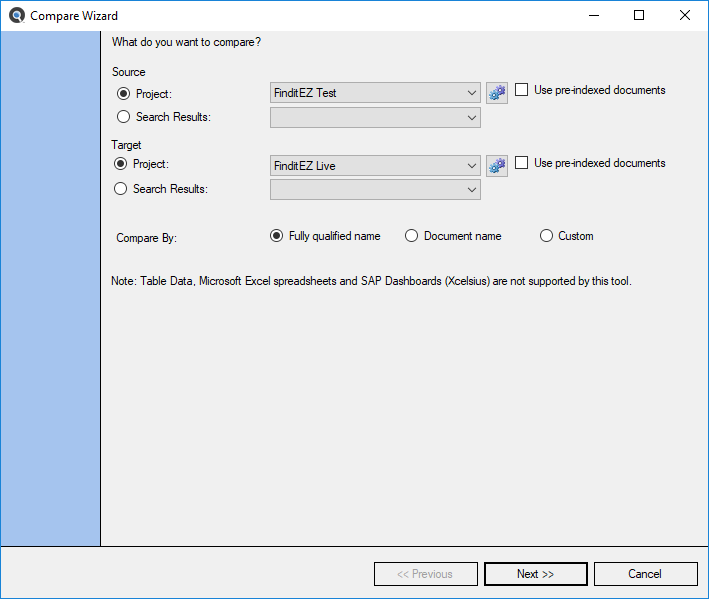
- To compare files or database objects within a project:
In the Source or Target section, choose the Project option.
Tip: You may compare different files within a Project by selecting the same Source and Target along with a CustomCompare By option.
- From the project drop-down list, click to select the name of the project you want to compare.
- To change settings for the selected project, click on the corresponding gears icon to the right.
If desired, click to check the Use pre-indexed documents check-box.
Note: Use of pre-indexed documents will improve performance. However, the documents compared may not be the latest content as the index will not be refreshed to check for any updates prior to executing the comparison of project files previously indexed.
- To compare search results:
- In the Source or Target section, choose the Search Results option.
- From the search results drop-down list, click to select the desired search results. Note the date and time.
- In the Compare By section, click to choose one of the following three methods of comparison:
- Fully Qualified Name - automatically matches documents by name within identical Source and Target, qualified by identical sub-folder path or database name.
- Document Name - automatically matches documents by name within identical Source and Target. The files do not have to reside in the same source and target paths or databases as is the case for Fully Qualified Name option above. Note:Use this option when the database name or folders where documents you would like to compare are different, but the document names themselves are identical between source and target projects / search results being compared.
- Custom - allows full end-user control of Source and Target document pairs to compare. Note: Use this option to compare the contents of files with different filenames or contents of completely different file types (e.g. a database procedure to a SQL script file, for example).
- To continue, click on the button.
Update Index for Compare
Once you choose the compare source and target and click on the button, the index begins updating. See example below:

The next example contains some errors:
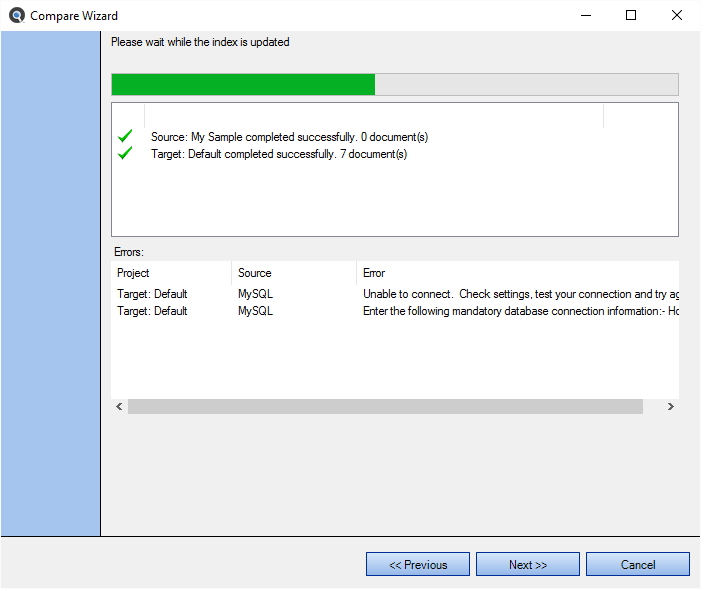
Use the horizontal scroll bar to view details of any errors, then correct and re-run the wizard or ignore any issues if they are not relevant to the documents you intend to compare.
Once the index update is complete, click on the button to continue.
Select Documents to Compare
After selecting the source and target and then allowing the index to update, you will be prompted to select the types of documents to be compared. You may optionally select a specific subset of individual documents by name. See example below:
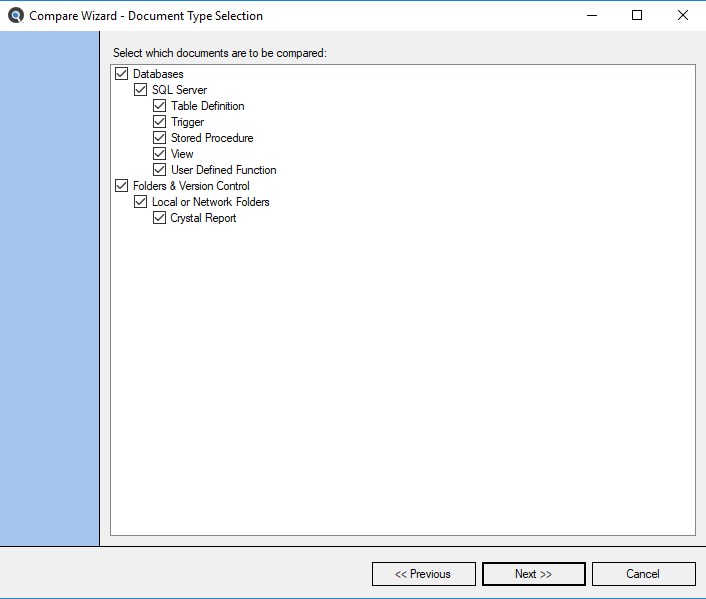
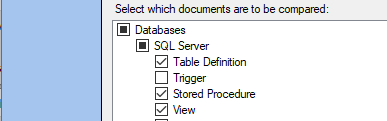
Click to check a category to 'select all' for a category. Or, click on the '+' to expand a document type and click to check the desired documents for comparison.
If you selected the Compare By Custom file mapping option on the main Compare Wizard dialog, you will be prompted to map each desired source and target document pairing to compare.
There are three custom mapping options:
First, you can “auto map” by fully qualified path & name by clicking on the button. See example result below:
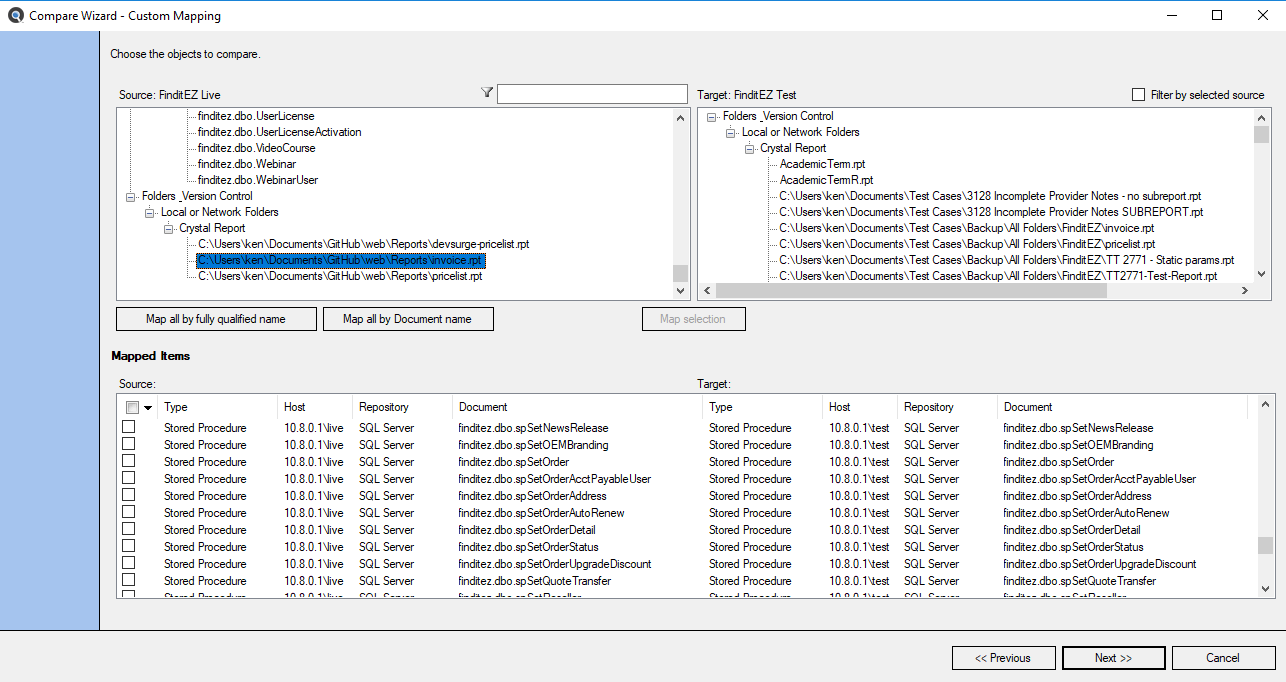
Note that all Source and Target documents with identical names that are also located in the same project "relative" paths or the same database type & name have been moved to the Mapped Items list. This can be considered a "top down" auto-mapping of documents, including the relative path names to find matches between source and target project settings.
Tip: This option is the same automatic mapping as Compare By: Fully Qualified Name on the main Compare Wizard dialog window. However, by choosing the Custom mapping selection on the first step allows you to also add or remove individual "mapped items" if desired to further refine your Source and Target documents on this Custom Mapping dialog.
Second, you can “auto map” by document name by clicking on the button.
Note that all Source and Target documents with identical names ( including document type / extension ) have been moved to the Mapped Items list. The order in which source and target documents are selected is based on the order in which source and target items were indexed. This can be considered a "bottom up" auto-mapping of documents, using the document names themselves as the primary key to locate matches between source and target project items.
Tip: This option is the same automatic mapping as Compare By: Document Name on the main Compare Wizard dialog window. However, by choosing the Custom mapping selection on the first step allows you to also add or remove individual "mapped items" if desired to further refine your source and target documents on this Custom Mapping dialog.
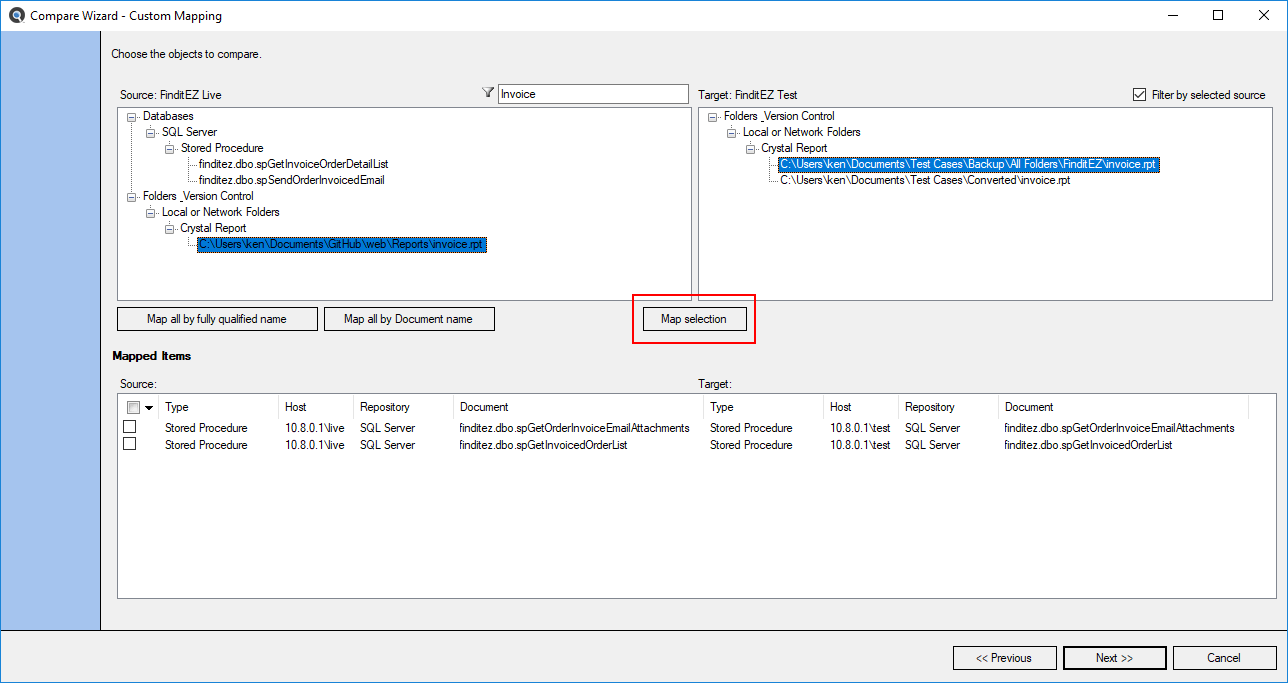
Third, you can select an individual source and target file to “map” for comparison of contents, as follows:
- Click to select and highlight the desired item in the Source list.
- Click to select and highlight the desired item in the Target list. This will enable the button below the Source and Target list boxes.
-
Click on the button. See example below:
-
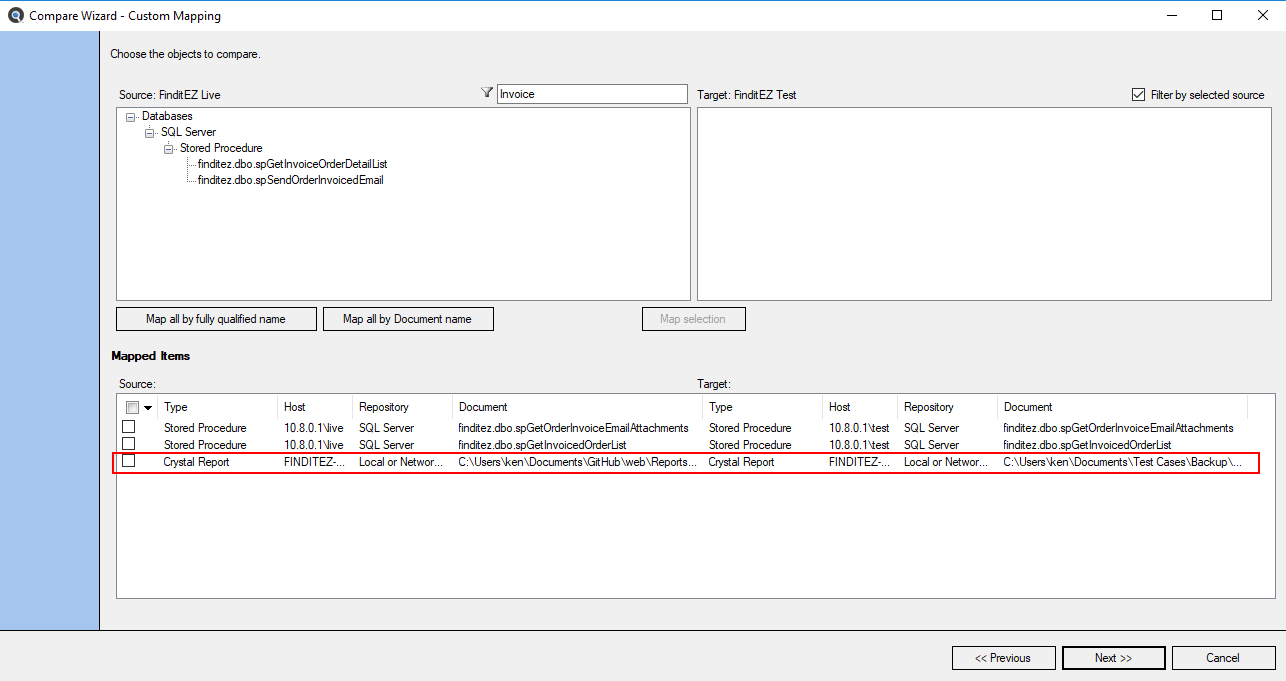
As each document from the Source and Target lists are included in a mapping pair for comparison, they are removed from the top two respective lists, and added to the Mapped Items list at the bottom. See example below:
Note: Once one or more documents are “mapped” to be compared, there is a context menu on the left that allows you to select and remove one or more mapped documents. Click on the down arrow to view. See example below:

- After mapping all document pairs to be compare, click on the button to continue. This takes you to the Compare Wizard summary dialog.
Tip: When mapping individual documents, you can enter text in the Source Filter box to restrict to a subset of source documents. See example below: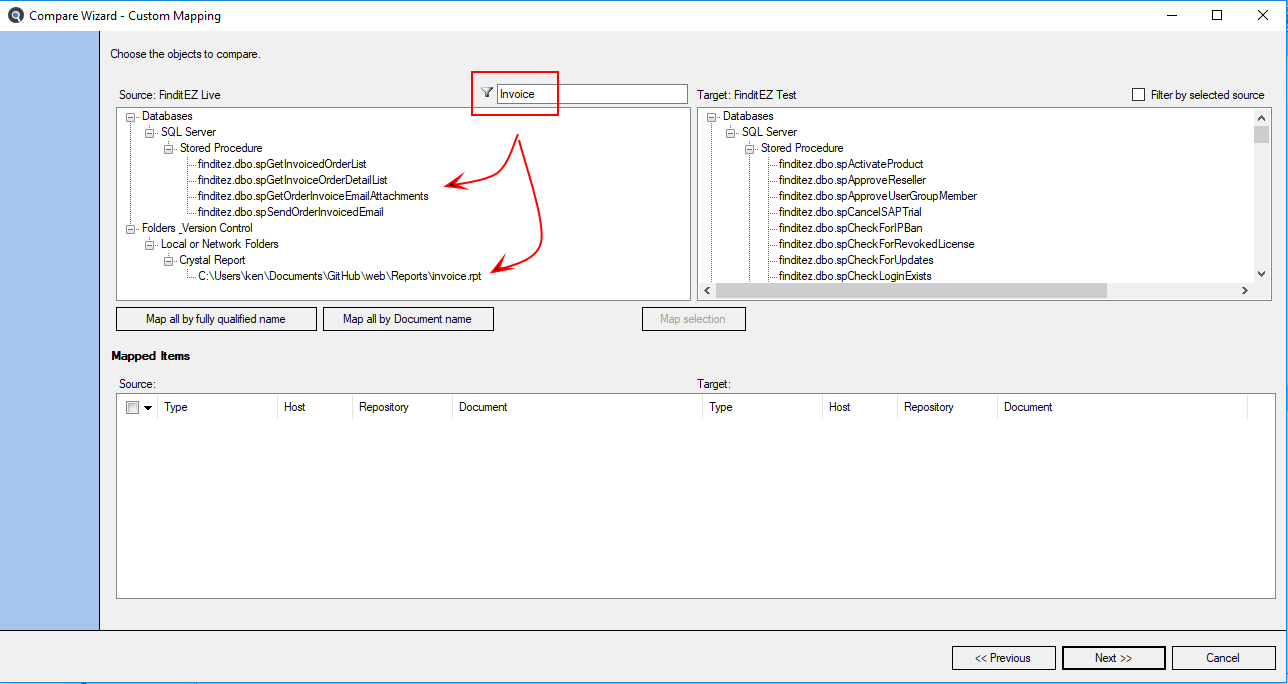
Tip: When mapping individual documents, you can check the Filter by selected source to return a subset of likely target documents to compare based on a “fuzzy match” algorithm. This reduces the amount of target documents to scan through. See example below: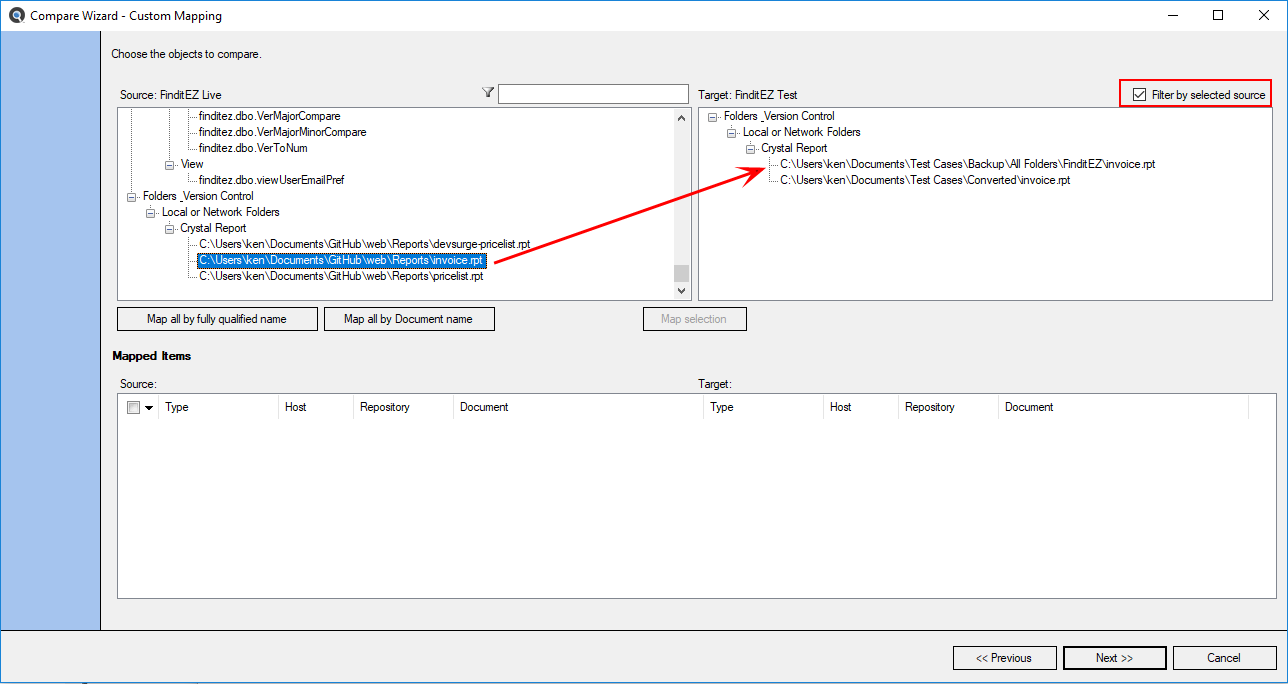
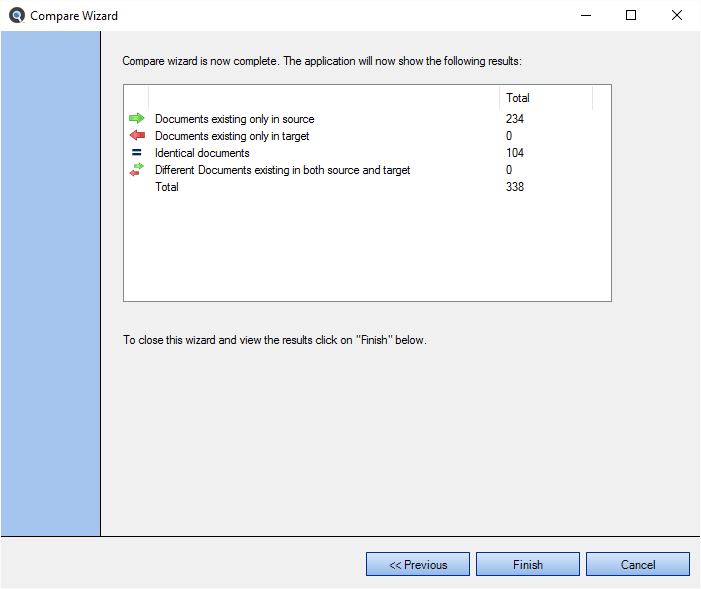
View Compare Results Summary
Once the compare is complete, the following summary will appear. See example below:
To close the Compare Wizard and view the results in the Results window, click on the button.